
Short version: What follows is how take a 8' x 6" plank of PVC and make five housings to protect cell phones being used as GPS receivers. The raw plank cost a little more than $20. The more expensive part was the 2" double sided velcro, which may have been overkill. One of the very nice added benefits of such housings is that if dropped in the water they float even when holding a cell phone.
Parts list:
8' x 5 7/8" x 5/16" PVC plank
from Lowes, item # 210630. cost ~$22
PVC primer and cement
from most hardware stores, cost ~$10
#6-32 x 1/4" (100 Pcs) Button Head Hex Socket Cap Screws Bolts, 304 Stainless Steel 18-8, Hex Drive
from Amazon, cost ~$6 and it comes with an allen wrench for the screws.
Black Double Sided Hook and Loop (2 inch) velcro - 5 yard option will do
from https://countrybrookdesign.com/2-inch-black-double-sided-hook-and-loop.html, cost varies
RELIABILT 50.0-ft x 0.16-in Braided Nylon Rope
from Lowes, cost ~$8
Tools:
table saw
a small hand saw / jig saw
a drill, a 1/8" bit, and a 1/4" bit
soldering iron (for buring hole through velcro into PVC)
optional - router with 3/8" roundover bit
Assembly steps: Four quick notes before starting:
1) These steps are presented from the persepctive the reader knows how to use each of the tools and equipment involved with each step. If the reader does not have such know how, please only do this with the help of someone who does.
2) The following drawings are not to scale.
3) The images and drawing are for building the housing to hold a Moto g Play 2024. Adjust the measurements for the device to be held in the housing.
4) The PVC plank is smooth on one side and faux wood grained on the other. The housings were constructed with the smooth face in, faux grain out. There was no special reason for this approach.
Now, to build the housings:
In their fitted waterproof cases the Moto g Play 2024 phone were 7" long, so the 8' plank was cut into ten (10) 8 1/4" long segments; the extra length beyond 7" will be explained later. There will be a 'remainder piece' about one foot long; part of this 'remainder piece' will be used.

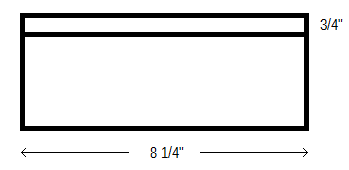
Set the guard for the table saw to just over 3/4". For each of the ten (10) 8 1/4" x 5 7/8" pieces cut off a 3/4" x 8 1/4" piece.
WHILE THE GUARD IS STILL SET, take the 'reminder piece' and cut off three (3) 3/4" x 5 7/8" pieces.
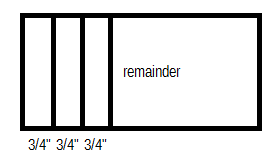
All these 3/4" slices need to be are the same 3/4" size, hence why they all need to be cut from the same guard setting.
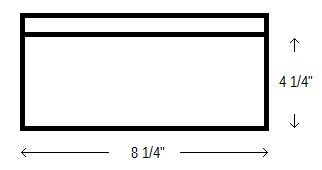
Now set the guard to just over 4 1/4" and cut each of the ten (10) 8 1/4" pieces to 8 1/4" x 4 1/4"
Using the hand saw take each of the three 3/4" x 5 7/8" pieces and cut them in half so that there are, after allowing for the material lost to sawing, six (6) 3/4" x ~ 2 7/8" pieces. Five of these six pieces will each be a 'bottom' for each of the housings.
- - - - - This concludes the PVC cutting. Now for the assembling the pieces. - - - - -
The PVC piece can be divided into five groups. Each group will be a housing and should have:
two (2) 8 1/4" x 4 1/4" - these are the faces
two (2) 8 1/4" x 3/4" - these are the sides
one (1) 3/4" x 2 7/8" - this is the bottom
The five pieces are glued together in a sandwich like this:
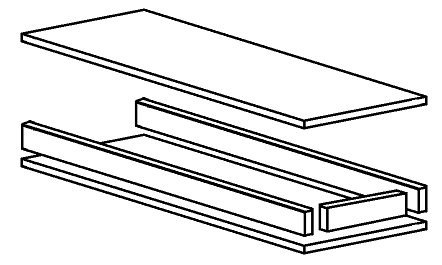
The 'top' of the housing remains open, for the the cell phone to slide in and out. The 'bottom' piece of the housing leaves open spaces on both sides, to acts as drain holes for water to escape.
After the glue has dried plug in the soldering iron. While it is warming up cut five (5) 21" long pieces of the 2" wide double sided velcro, one per housing. Place the velcro on the side of the housing as shown in this next picture. Take the hot soldering iron and press its point down at the three locations where the screws will go. Press the soldering iron through the velcro and slightly into the PVC, enough to mark the PVC.
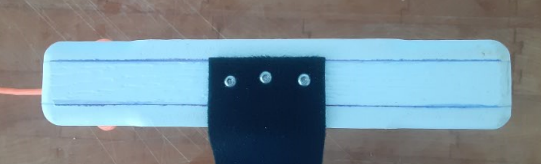
Remove the velcro the from the side of the PVC housing.
If the holes in the velcro are not already large enough for the screws to pass through then use the soldering iron to burn large enough holes.
Put the 1/8" bit in the drill, take the remainder piece of PVC and drill a test hole through it. Now try screwing a screw into that hole. PVC is a soft material - once a screw is all the way in it will not take much force to keep turning the screw and strip the sides of the hole. More importantly this test hole needs to have some bite to catch the threads in the first place. If there is no bite, then try a test hole with the next smaller size bit.
Once the proper size hole has been determined for the screw holes drill holes into the housing at the points previously marked by the soldering iron. Once the velcro holes are the proper size for the screws to pass through, use the screws to secure the velcro to the housing. Mounting the velcro with the loop (or soft) side out and the hook (or rough) side towards housing has been found to be the better orientation.
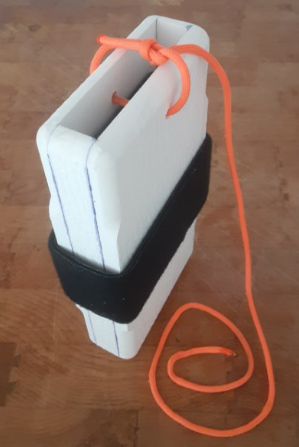
The final part is the Braided Nylon Rope. Cut off five (5) 36" long pieces. Use a flame for fusing each end, to keep them from unraveling. The faces of the housings were cut to 8 1/4" even though the phones are only 7". This was done to make space for the holes this rope goes through. This rope serves two purposes: 1) it keeps the phone in the housing, and 2) it provides a secondary method, besides the velcro, for keeping the housing attached to the boat. Drill 1/4" holes so that the rope goes through both housing faces just above the center top of the phone when the phone is in the housing. A bowline is a good knot for the rope end at the top of the casing (see image at top of page).
Optional finishing touch: Even though the PVC is a soft material, the square corners on the just made housing can catch, cut, poke, scratch, etc., in all sorts of ways. A router with a 3/8" roundover bit was used to put rounded edges on the housings. These rounded edges can be seen in the above color pictures.
The equipment and parts mentioned on this page are for informational purposes only; no guarantee or endorsement is implied in any way about those products or their manufacturers.